

Connect Brightspace
Rowseta reads your data through a Brightspace OAuth 2.0 app that uses the Client Credentials grant, signed in as a service user that can access Brightspace Data Sets. You do this once, in Brightspace, then paste two values into Rowseta.
If you don’t see this menu or button, your role doesn’t include it. Ask someone who can edit roles (Owners and Admins by default).
You also need a Brightspace administrator account for the setup steps there.
1. Open the setup in Rowseta
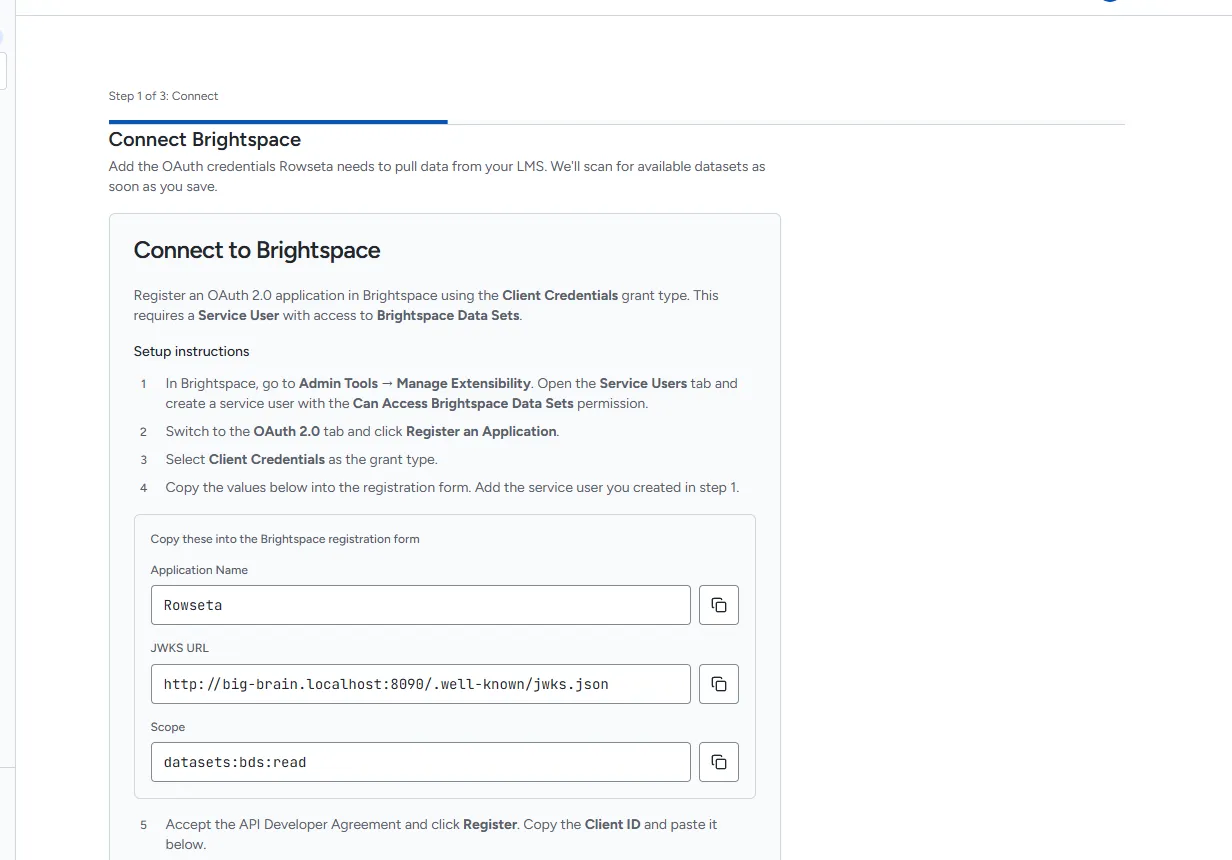
Section titled “1. Open the setup in Rowseta”- Sign in to Rowseta. On a new Organization, Home opens the setup at Step 1 of 3: Connect.
- Keep this page open. It shows the values you copy into Brightspace.
2. Create a service user in Brightspace
Section titled “2. Create a service user in Brightspace”- In Brightspace, go to Admin Tools > Manage Extensibility.
- Open the Service Users tab and create a service user.
- Give it the Can Access Brightspace Data Sets permission.
3. Register the OAuth 2.0 app in Brightspace
Section titled “3. Register the OAuth 2.0 app in Brightspace”- Still in Manage Extensibility, open the OAuth 2.0 tab and select Register an Application.
- Select Client Credentials as the grant type.
- Copy each value from the Copy these into the Brightspace registration form box in Rowseta
into the Brightspace form. Use the copy button next to each field:
- Application Name:
Rowseta - JWKS URL: your Rowseta address followed by
/.well-known/jwks.json, for examplehttps://big-brain.rowseta.com/.well-known/jwks.json - Scope:
datasets:bds:read
- Application Name:
- Add the service user you created in step 2.
- Accept the API Developer Agreement and select Register.
- Copy the Client ID that Brightspace shows.
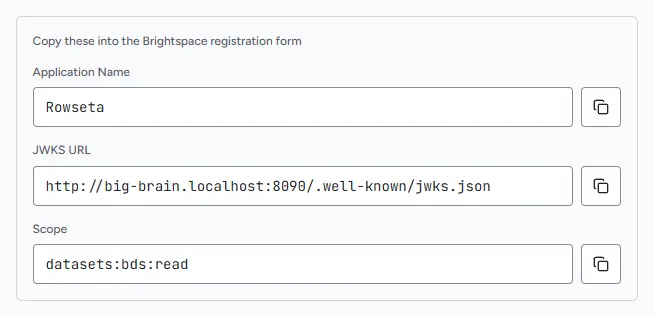
There is no client secret to copy. Rowseta signs in to Brightspace with its own key, which Brightspace finds at the JWKS URL.
4. Test and save in Rowseta
Section titled “4. Test and save in Rowseta”- In Brightspace URL, enter the address people use to reach your Brightspace, for example
https://big-brain.brightspace.example. Use the main address only, without a page path. If you paste a longer address, Rowseta shows Did you mean …? with the main address; select it to use it. - In Client ID, paste the Client ID from Brightspace.
- Select Test connection. Wait for Connection successful.
- Select Save & continue.
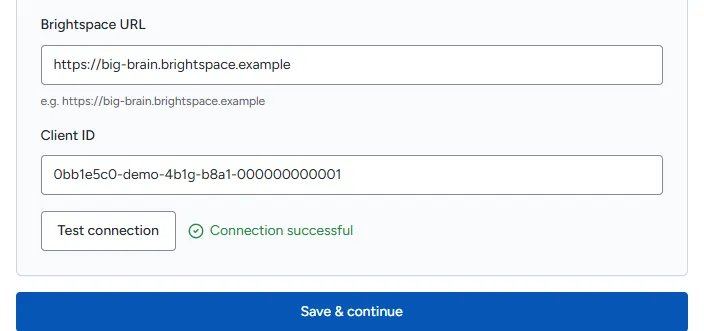
The Save & continue button stays disabled until the test succeeds. If the test fails, Rowseta shows why; see Troubleshooting the Brightspace connection.
After you save, Rowseta starts scanning Brightspace for the datasets your institution can use.